Why Use Ultrasonic Baths for Motorcycle Carburetor Cleaning?
|
Get Expert Advice Save time. Let us help you
find the perfect cleaning system for your needs and budget. 973-821-3406 | Chat | Email |
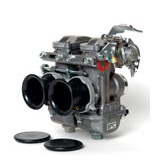
Bikers can spend big bucks to get the motorcycle of their dreams. Regardless of your investment in your bike keeping it running right calls for a periodic cleaning of the carburetor - a most vital engine component. Bikers with a bit of mechanical savvy (as well as motorcycle service departments) can save a lot of time while ensuring excellent results by following our suggestions on how to clean your motorcycle carburetor.
This post will cover
- Traditional and the best option for cleaning motorcycle carburetors
- The benefits of ultrasonic cleaning motorcycle carburetors
- How ultrasonic carb cleaners work
- How to clean your motorcycle carburetor
- Ultrasonic cleaning solution and cleaner maintenance tips
- Where to go for help
Traditional and the Best Cleaning Option for Motorcycle Carbs
If you take care of your own bike, belong to a club, or operate the service bay in a dealership you're probably aware that manually cleaning carbs can be a real pain and time-consuming when using environmentally unfriendly solvent wash tanks, brushes and aerosol sprays.
Moreover, these cleaning methods do not deliver the professional results obtained when an ultrasonic cleaner is used to restore carburetors and similar components to a like-new condition.
Even better, time (and labor costs) are substantially reduced because cleaning can be accomplished in as little as 20 minutes - depending of course on the amount of contaminants to be removed.
If you run a shop, this suggests that an ultrasonic cleaner will soon pay for itself by increasing your throughput. That's because carburetor and other critical motorcycle components do not have to be completely disassembled, but simply immersed in a biodegradable ultrasonic cleaning solution.
This frees up time that could be better spent working on the next project while the ultrasonic cleaner does its work . A faster turnaround is an important part of keeping customers happy.
If you are a shade-tree motorcycle mechanic it means you'll be back on the road a lot quicker.
 The Benefits of Ultrasonic
Cleaning Motorcycle Carburetors
First a look at an ultrasonic cleaner:
Ultrasonic motorcycle carburetor cleaners such as offered by iUltrasonic consist of
- a stainless steel tank to hold the cleaning solution (more on that later)
- an ultrasonic generator that powers small but powerful devices called ultrasonic transducers
- a heater and
- a control panel that allows you to activate the unit and select cleaning time and cleaning solution temperature.
The transducers are mounted on the outside bottom of the tank and when activated vibrate at ultrasonic frequencies such as 37,000 and 40,000 cycles per second (37 or 40 kHz).
This causes the tank bottom to vibrate like a membrane and create billions of microscopic vacuum bubbles.
The bubbles are so small that they penetrate the smallest cracks, crevices, blind holes and openings in carburetors and other engine components.
On contact they implode to blast loose and carry away the most tenacious contaminants. These are contaminants difficult if not impossible to reach using brushes, solvents and sprays.
Yet the process is so fast that it does not damage gaskets and similar parts.
A useful feature is something called a Sweep mode. What this does is automatically slightly vary the ultrasonic frequency to avoid what are called "standing waves." This avoids areas of high and no cleaning action in the solution.
How to Clean your Motorcycle Carburetor
Here' a suggested procedure that you will refine based on your own experience.
But first a tip:
It’s a good idea to pre-clean grossly contaminated parts – i.e. scrape off heavy carbon buildup, mud and similar contaminants. This helps preserve the useful life of the solution.

Also note that solution will be displaced by parts being cleaned so once the solution is prepared you may have to drain off a quantity and set it aside. When operating, the tank should not be overfilled or under filled. As with all ultrasonic cleaning procedures, practice helps develop your process.
Four Steps to Prepare for the Cleaning Cycle
- 1.Use an ultrasonic cleaning solution concentrate formulated for cleaning carburetors and similar motorcycle engine parts. A good example is mildly alkaline biodegradable elma tec clean A4 diluted to 1 to 5% with water. It is formulated to clean carburetors, engine parts, gears, bearings, fuel injectors and sport and recreation power equipment when diluted with water.
- 2.Fill your ultrasonic cleaner tank half way with water, add the correct amount of cleaning solution concentrate for a full tank then add water to the fill line.
- 3.Before cleaning turn on the unit and heater then and allow it to operate for 10-20 minutes to degas the solution. This removes cavitation inhibiting trapped air and it must be done each time you prepare fresh cleaning solution. (Some cleaners are equipped with a degas mode.)
- 4.Adjust the thermostat to the suggested cleaning solution temperature. For elma tech clean A4 it is 50 to 80⁰C (120-175⁰F).
7 Steps to Conduct the Cleaning Cycle
When you’re ready to do the job, we suggest partial disassembly of carburetors so the cleaning solution reaches into the float chamber.
- 1.Place motorcycle carburetor or other components to be cleaned into the mesh basket.
- 2.Avoid, if possible, parts contacting each other.
- 3.Lower them into the cleaning solution. Make sure all parts are fully immersed.
- 4.Set the timer for 20 minutes. Timer-equipped units will turn off at the end of the cleaning cycle.
- 5.When the cycle is completed remove the basket and check for results.
- 6.Remove traces of cleaning solution with a fresh water rinse.
- 7.Parts should be dried before reinstallation.
Ultrasonic Cleaning Solution and Cleaner Maintenance Tips
Demulsifying cleaning solutions such as elma tec clean A4 allow grease and similar contaminants to rise to the surface of the
When the cleaning solution becomes noticeably dirty or cleaning time is extended, drain the tank and dispose of the spent solution and skimmed off contaminants in an approved manner.solution. Skim these off and set them aside for later disposal.
Take the time to clean the tank following the manufacturer’s instructions to remove contaminants that settled to the bottom. Then refill it with fresh cleaning solution.
You're ready for the next cleaning cycles.
Help in Selecting your Motorcycle Carburetor Cleaning Kit
iUltrasonic offers a variety of ultrasonic cleaning kits at attractive pricing for the individual enthusiast or operators of motorcycle sales and service organizations. Other, larger capacity units are also available along with a variety of cleaning solution concentrate formulations to solve virtually all ultrasonic cleaning challenges.
Contact the ultrasonic cleaning experts at iUltrasonic for help in selecting the correctly sized ultrasonic cleaner and cleaning solution concentrate to meet your motorcycle carb cleaning and maintenance needs.


