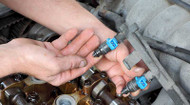
Fast, Thorough, Fuel Injector Cleaning with Ultrasonic Energy
|
Let Us Help We can help you
find the perfect storage unit for your needs and budget. |
Fuel injectors have largely replaced carburetors and spark plugs on internal combustion engines. As with the importance of periodic carburetor cleaning, maintaining engine fuel economy, quick response and smooth operation over time could require fuel injector cleaning. This is an operation where a short cycle in an ultrasonic cleaner yields results far superior to gas tank additives and blowing fuel rails and injectors with high pressure air.
A report by CarAdvise notes "The ultrasonic injector cleaning method is considered to be the most effective method of restoring injectors." The report explains "Injectors can become partially plugged due to a variety of factors including age, dirty fuel, and the combustion process. A thorough fuel injection cleaning can help to remove these deposits on the injectors and restore their proper function."
How Fuel Injectors Work
Fuel injectors work like miniature spray guns that spray fuel into internal combustion engine chambers.
Because fuel injectors have extremely fine openings, over time they may clog, reducing engine performance and fuel economy. As with carburetor cleaning, periodic fuel injector cleaning is important to maintaining or restoring optimum engine performance.
Fuel Injector Replacement Costs
Avoiding fuel injector maintenance can be costly.
According to a posting by AutoZone "…the average cost of fuel injector replacement can vary depending on several factors, such as the make and model of your vehicle, the severity of the issue, and your location.
"However, on average, you can expect to spend anywhere from $500 to $2,500 for this fuel injector replacement. Some individual fuel injectors can under $40 each while others are several hundred apiece."
Why Injector Cleaning with Ultrasonic Energy Works Best
While several methods describing how to clean fuel injectors are on the market, some require complex fussing with fuel lines.
An ideal method for automotive repair services and backyard mechanics is simply immersing fuel injectors in an ultrasonic cleaning solution and letting cavitation action – ultrasonic energy – do the job in minutes. This follows the recommendation in the CarAdvise link above.
Ultrasonic cleaning is defined as the powerful but safe implosion of millions of minute bubbles in a biodegradable ultrasonic cleaning solution.
The bubbles are produced by the cleaner’s generator powered transducers vibrating at ultrasonic frequencies such as 37 and 40 kHz. These tiny bubbles reach all surfaces of the injectors, even the interior of the nozzles, to loosen and carry away all contaminants.
This cleaning action will not damage other injector components.
Ultrasonic Injector Cleaning Kits
Full service auto repair facilities and DIY shade tree mechanics can put the power of cavitation to work cleaning fuel injector nozzles with one of the Sonic auto parts Grease Buster Kits available from iUltrasonic with cleaning solution capacities from ¾ to 10 gallons.
The kits, designed for fuel injector, carburetor and other auto parts cleaning, include a powerful ultrasonic cleaner with lid and basket, a supply of elma tec clean A4 biodegradable cleaning solution concentrate that dilutes to 1 to 5% with water, and an instruction manual.
These ultrasonic systems also clean other engine components faster and safer than sprays and solvents used in parts washers.
Setting Up the Fuel Injector Cleaning System
Select a location supporting orderly flows of work. Proximity to a sanitary drain is ideal for disposing of spent cleaning solution, but first check with local authorities. While elma tec clean A4 cleaning solution is biodegradable it’s wise to be sure it’s OK to pour down the drain.
Following is a brief description on how to clean fuel injectors:
- Fill the tank half full of water and add the correct amount of cleaning solution concentrate. As an example, for the ¾ gallon tank add approximately 2/3 cup; for the 1.6 gallon tank 1-1/4 cup. Continue adding water to the tank fill line.
- Degas the solution by operating the injector cleaning system for 15-20 minutes. This drives off cavitation inhibiting entrained air and also mixes your solution. The degassing step must be performed every time you prepare fresh cleaning solution.
When you are ready to clean:
- Carefully position the fuel injectors in the basket with nozzle holes facing up. It’s important that the solution accesses the interior of the injectors.
- Activate the ultrasound, lower the basket into the solution and place the lid on the tank to reduce evaporation and noise.
- Set the timer for 15 minutes. Cleaning time depends on condition and can be adjusted either way. Depending on fuel injector configuration it may be beneficial to remove the basket and reposition the injectors. (Note the solution will get hot, do not reach into it, and consider wearing protective gloves.)
- When satisfied rinse the injectors in fresh water and blow dry with an air hose.
Fuel Injector Cleaning Bath Maintenance
Remove and set aside floating contaminants. Remove and replace the cleaning solution when it loses its effectiveness. Drain the tank and dispose of the solution and collected skimmings, according to local regulations.
Follow the instruction manual on cleaning the tank then fill it with fresh solution.
Contact iUltrasonic for expert, unbiased cleaning advice for on injector cleaning, carburetor cleaning and other engine cleaning challenges.


